Sunday, August 26, 2012

The yummiest chocolate pecan pie ever


Whenever I go to Avoca (an Irish restaurant that cooks delicious food) I cannot resist this pie. I've looked for the recipe for years with no success - it's not in the Avoca cooking books, and all my attempts at modifying similar recipes yielded disappointing results. Then, finally, some days ago, I found the recipe on the Internet and tried to reproduce it. Perfect! That was it! The problem is that this pie has done nothing but calling my name until I ate at least half of it in a few days! But it was worth it: taste it and you won't be disappointed!


Tools:
  • a pie dish

Ingredients:

for the pastry
  • 224g plain flour
  • 127g butter 
  • 28g caster sugar
  • 2 free-range egg yolks
  • a little cold water
for the filling
  • 226g dark chocolate (53% cocoa contents, OR half dark chocolate with 70% cocoa solids and half milk chocolate with 30% cocoa solids)
  • 113g butter
  • 113g caster sugar
  • 113g brown sugar
  • 113g plain flour
  • 142g pecan nuts
  • 2 free-range eggs
  • 1 drop of vanilla extract
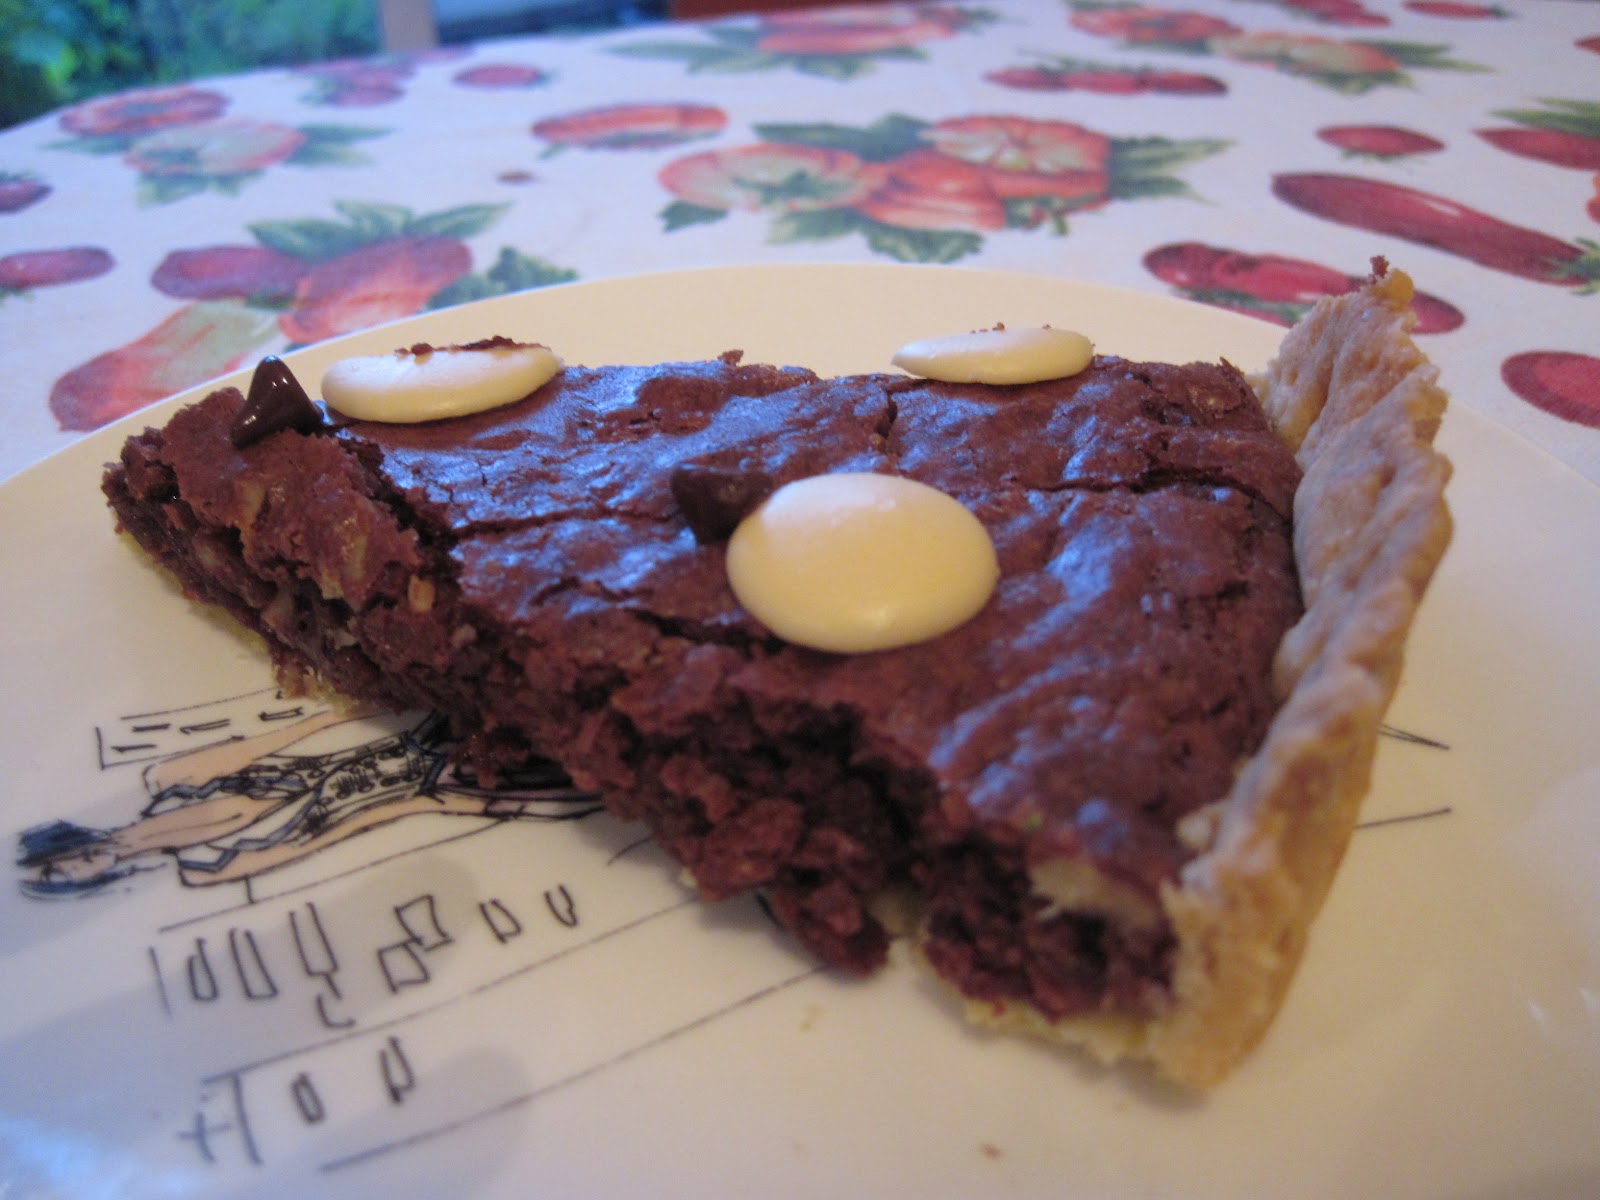
to decorate
  • dark and white chocolate buttons

Method:

for the pastry

Sift the flour into a large bowl. Dice the butter and add it to the flour, then rub the two together until they look like fine breadcrumbs. Add the caster sugar, then the egg yolks and a little water if necessary, and mix well. Make up a ball, wrap it in cellophane and let it rest in the fridge for at least 30 minutes. Rub some butter onto the pie dish, then sprinkle it with flour and shake out the excess. When the pastry is ready, roll it out onto a lightly floured surface. Helping yourself with a rollin pin, transfer it onto the pie dish. Don't worry if it breaks, you can easily fix it with your fingers! Push it onto the base and sides of the dish and pierce its surface with a fork.

for the filling

Pre-heat the oven to 160 ÂșC. Cut half the chocolate into chunks, then pour it onto a large bowl and add both types of sugar, the chopped pecans, vanilla essence and flour. Mix well.
Melt the butter, add it to the other half of the chocolate and mix well until it has melted. Pour the wet ingredients into the dry ones, add the eggs and mix well.
Pour the mixture onto the pastry, then bake for 35-40 minutes until the sides have settled but the centre still has a little wobble in it. Decorate it with chocolate buttons.
Delicious served warm with whipped cream or vanilla ice cream. Be careful, you won't be able to stop eating it!


Thursday, May 3, 2012

Apple and Forest Fruit Pie


Are you looking for a dessert which is perfect for spring, delicious and beautiful? Well, you've found it! Although preparing the pastry requires a little time, this pie is extremely simple to make and packed with vitamins ... what more could you ask for?
If you wish to use frozen forest fruit (or any other berries, such as blackberries, blueberries or raspberries), remember to leave them out of the freezer to thaw the night before you make the pie.


Ingredients:
for the pastry
  • 330g plain flour
  • pinch of salt
  • 175g cold unsalted butter, cut into small pieces
  • 1 large free-range egg, lightly beaten
  • whipped cream or custard, to serve
for the filling
  • 750g cooking apples, peeled, cored and cut into small chunks
  • 750g forest fruit (or berries of your choice)
  • 100g caster sugar, plus a little extra for sprinkling
  • juice of half a lemon
  • 1 tbsp plain flour

Requirements:
  • a 23cm tart tin, about 2.5cm deep, with a removable base


Method:
To make the pastry, sieve flour and salt into a large bowl. Add the butter cut into chunks and, with your fingertips, rub it against the flour until the mixture resembles fine breadcrumbs. Add 4-6 tablespoons of water, one at a time, until you can shape the dough into a ball. You might not need all the water. Wrap the dough in cling film and let it rest in the fridge for at least 15 minutes.
To make the filling, toss the apples and berries in a large bowl together with the sugar, lemon juice and flour.
Pre-heat the oven to 180 °C (175 °C for fan ovens), gas 4.
Rub some butter onto the tin, then pour in some flour and get rid of the excess. This will help make it non-stick.
Sprinkle some flour on a clean, hard surface, then roll out two-thirds of the pastry to a 29cm circle. Gently lift it with a rolling pin and transfer it to the tart tin. Press the pastry into the base and sides of the tin, then trim it level to the edges of the tin. Knead the scraps into the remaining dough. Spoon the apples and berries into the pastry case.
Roll out the remaining pastry and, with a knife, cut it into strips. Brush the edges of the pastry case with some beaten egg, then arrange the strips horizontally and vertically on top of the fruit to create a lattice pattern, pressing their ends onto the pastry rim. Trim any excess pastry.
Brush with some more beaten egg and sprinkle with sugar.
Bake the pie in the oven for 45 minutes - 1 hour, watching it now and then to make sure not to overcook it (if it is acquiring too much colour, lower the temperature by 5 °C). The pastry must be golden; the juices bubbling.
Let it cool down outside the oven and serve it warm with whipped cream or custard.
Buon appetito!

Friday, April 27, 2012

Naoimh's sugar-free, dairy-free, gluten-free fruit loaf


My friend Naoimh suffers from gluten intolerance and loves eating very healthily. How could I get her to enjoy my desserts? I had to solve this problem when, inviting me to her place, she challenged me to bake a cake with no gluten, no dairy, no sugar. What am I going to do? I wondered. A cake without those ingredients would not be sweet, and surely it wouldn't be nice! Well, I was wrong. Another friend, the Polish author of Magda's Cauldron, found a recipe blog that was perfect for my dilemma, Anja's Food 4 Thought, containing plenty of desserts dedicated to those who suffer from coeliac disease and/or dairy intolerance. After making some small changes, I baked this loaf and offered it to Naoimh, wondering whether something so healthy could also be edible ... and I got a surprise when Naoimh wasn't the only one who liked it . In fact, everyone did! Perfect for breakfast, this loaf is sweetened with fruit and contains no flour. Buon appetito:-)

Requirements:
  • a loaf tin
  • measuring cups (1 cup = 250ml, 1/2 cup =125ml, 1/3 cup = 80ml, 1/4 cup = 60ml)
  • food processor to grate the carrots

Ingredients:
  • 3/4 cup of almond powder
  • 1 tsp baking soda
  • 1/2 tsp ground cinnamon
  • 2 eggs
  • 1 tsp vanilla extract
  • 4 tbsp light olive oil (or coconut oil)
  • 3 very ripe bananas (2 if they are large), mashed
  • 1/2 cup seedless dates, chopped (you can replace these with dried apricots)
  • 1/2 cup carrots, coarsely grated
  • 1/4 cup chopped hazelnuts
  • 1/2 cup dried coconut shavings (1/4 if you used coconut oil)
  • 1/4 cup of cranberry (or other chopped fruit)
Method:
Pre-heat your oven to 170 °C (fan) or 180 °C (traditional), gas 6.
Butter the loaf tin, then pour on it some almond powder and get rid of the excess. This way, you will stop the cake from sticking to the tin.
In a large bowl, mix almond powder, baking soda and cinnamon.
In another bowl (or in that of a food processor), beat the eggs. Add vanilla essence, oil and mashed bananas, and mix.
Mix the wet ingredients with the dry ones. Still mixing, add dates (or apricots), carrots, coconut shavings, chopped hazelnuts and cranberry (or other fruit). 
Pour into the tin and cook for 35-40 minutes, checking the loaf by inserting a skewer in the centre of it. If it comes back wet, wait another 5 minutes. The banana might remain a little liquid, thus wetting the skewer even though the cake is ready, so make sure you don't overcook it. It should be quite dark on the top, but tender on the inside. 
Let it cool down, and enjoy it with no guilt!


Saturday, April 21, 2012

James's Rhubarb Crumble


Oh, but I love Saturday mornings! I get up at ten and watch my favourite cooking programme - 'Saturday Kitchen' on BBC One - while my boyfriend makes chocolate pancakes. I must admit to being a big fan of blue-eyed James Martin, who every week teaches the public to cook something delicious while interviewing famous chefs and guests :-) 
All the recipes mentioned in the programme can be found on the BBC website, and that's where I came across the Rhubarb Crumble. I was looking to use five large rhubarb stalks I had bought, but all the recipes in my cooking books involved the use of double cream or custard, and I wanted something healthier ... so I searched online, and James Martin's version of this classic came up. With some small changes, here it is for you to try. It's easy, quick and full of vitamins - and what better dessert to make now that rhubarb is in season?


Requirements:
  • an ovenproof dish

Ingredients:
  • 5 large (or 10 small) sticks of rhubarb
  • 4 tbsp water
  • 8 tbsp caster sugar
  • 1 tsp powdered ginger
  • 110g softened, unsalted butter
  • 110g Demerara sugar
  • 200g plain flour
  • whipped cream or vanilla ice cream to serve

Method:
Pre-heat the oven to 180 ÂșC. Cut the rhubarb sticks into chunks and place them on an oven tray. Sprinkle them with the water and caster sugar and roast in the oven for 10 minutes. 
While you wait, make the crumble topping by rubbing the butter into the flour and demerara sugar with your hands, in large bowl. The result will resemble fine breadcrumbs. 
Remove the rhubarb from the oven, sprinkle the powdered ginger on top of it and mix well.
Put the rhubarb into an ovenproof dish and sprinkle the crumble topping over it. Pat down lightly with your hands to even it out, then bake for 35-45 minutes, or until the topping is golden-brown and the rhubarb is bubbling.
Remove the dish from the oven, allow it to cool for a few minutes, then serve the crumble with whipped cream or vanilla ice cream. Keep the remaining crumble in the fridge, and reheat before serving.
When sugar takes away its natural bitterness, rhubarb has a refreshing, zingy taste that is enhanced by the powdered ginger and is perfect on a sunny spring day.


Monday, March 26, 2012

Butternut Squash Muffins


Last October, I had a ton of leftover pumpkin that I wanted to put to good use - I love the colour and shape of it, the way you can employ it to make both savoury and sweet dishes. So I found this recipe on the brilliant Italian website Giallozafferano, and, after Halloween, started using butternut squash instead of pumpkin to make the lovely bright muffins you can see below. It's great to eat something so scented and tasty and find out that it contains a lot of fruit!
I let some friends taste these muffins without telling them what the main ingredient was, and they all loved them - it was a shock for them to learn they were eating butternut squash, which they thought of as a bland, tasteless vegetable.
It is easy to make butternut squash puree using the directions below, but remember that you need to plan ahead as it takes about 50 minutes.
This recipe definitely gives you an excuse to bake and enjoy your own creations - so get ready to don your apron and fill your kitchen with the delicious perfume of these healthy(ish) treats!


Requirements:
  • a 12-hole muffin tin
  • 12 muffin cases
  • a food processor

Ingredients:
  • 225g butternut squash (pulp)
  • a drizzle of olive oil
  • 150g unsalted butter (softened)
  • 100g cane sugar
  • 90g honey or golden syrup
  • 1 egg (medium)
  • 200g plain flour
  • 1 tsp baking soda
  • 1 pinch of salt
  • half a tsp cinnamon
  • 1 small pinch of nutmeg

Method:
Firstly, make the puree. Wash and dry the butternut squash. Using a large knife and a cutting board, and being very careful not to hurt yourself (butternut squash is really hard), cut it into four or five parts. Place them on a baking tray with the skin on top, and rub them with some olive oil. Cook them in the oven at 200 °C for 45 minutes, then check whether they have softened. If not, leave them in for another ten minutes. Then take them out of the oven and let them cool a little. When there is no danger that you might burn your fingers, peel them - it will be almost as easy as peeling a banana. Put the flesh into a food processor and whiz into a puree. You will need 225g of this to make the muffins.

Using the paddle attachment of your food processor, beat the softened butter until it gets creamy, then, still mixing, add the sugar and honey (or golden syrup). Add the egg and the puree and mix.

Preheat the oven to 200 °C. In a medium bowl sift the flour and baking soda, then add the salt and cinnamon, and mix with a spoon. Add the dry ingredients to the wet ones, and mix well.

Line the holes of the muffin tray with paper muffin cases, then pour the dough into them and bake in the oven for 15 minutes. Insert a toothpick or skewer into a couple of muffins: if it comes out clean, they are ready; if it is still wet, cook them for 4-5 more minutes.

Let them cool slightly, then serve and enjoy!


Wednesday, March 14, 2012

Cheer-up Chocolate Cake


OK, now it's time to be bad! Is it your birthday? Is it Christmas and there's no danger that Santa Claus might take away your presents? Or perhaps it's New Year's Eve and you're starting your resolutions tomorrow ... well, don't wait. This cake is a mouthful of heaven, and, although it takes a while to make, it's definitely worth the effort. Remember that the filling must be made about two hours in advance, so plan ahead. Better if served at room temperature, the Cheer-up Chocolate Cake is proven to dispel clouds and put a smile on the lips of the grumpiest people. Close your eyes and enjoy its rich taste. You deserve it!

Requirements:
  • a deep 20cm/8inch springform tin 
  • a food processor

Ingredients:
filling
  • 250 ml fresh cream
  • 225g white chocolate
sponge
  • 225g unsalted butter, room temperature
  • 225g caster sugar
  • 4 eggs
  • 175g self-raising flour
  • 55g cocoa powder
frosting
  • 350g dark chocolate
  • 115g unsalted butter
  • 85ml double cream
decoration
  • chocolate curls
  • 2 tsp icing sugar and cocoa powder

Method:
Firstly, make the filling. Pour the fresh cream into a small saucepan and bring it almost to the boil. Break the white chocolate into pieces, put it in a food processor and chop it coarsely. Then, leaving the motor running, pour in the cream. Continue to mix for 10 seconds or until it becomes smooth. Pour the mixture into a bowl and let it cool down, then cover it with some cling film and refrigerate it for 2 hours, or until it feels firm. When it's ready, whisk it (in the food processor or with electric whisks) until it starts holding soft peaks.

Secondly, prepare the sponge. Soften the butter, then put it into the food processor together with the sugar and beat them with the paddle attachment (alternatively, you can use electric whisks) until the mixture is light and fluffy. Beat in the eggs gradually. In the meantime, preheat the oven to 180 °C. Sift the flour and cocoa into a large bowl, then pour in the liquid mixture and fold it in. Grease the tin, dust it with flour and get rid of the excess (or line it with oven parchment), then spoon the mixture into it and bake in the preheated oven for 45-50 minutes, or until the cake feels springy to the touch and a toothpick inserted into it comes out clean. Let it cool down in the tin for a few minutes, then transfer onto a plate or a rack.

Lastly, make the frosting. Melt the chocolate and mix it with the softened butter and double cream. Continue stirring until the mixture cools down. When the cake has also cooled down, slice it carefully into three layers and spread the filling (the white mixture you made at the start) between the each of them. Then cover the cake with the (dark) frosting. Make some chocolate curls by shaving a bar of dark chocolate, better if chilled, with a potato peeler (mind your hands!) and sprinkle them over the frosting. Mix together icing sugar and cocoa powder and sift over the curls.

The scent will be irresistible. Lure in your best friends and give them a present of a delicious, scented chocolate dream. Don't forget to lick your fingers!


Monday, February 13, 2012

Supermum's Wholemeal Banana and Chocolate Bread

So, you feel like making (and eating) a cake, but you want to be good, too ... and you have some old, nearly gone off bananas? Well, then this is the recipe for you!
I originally took it from a lovely blog called Wit & Wistle, and made some little changes. A friend of mine, the author of Magda's Cauldron, found this recipe for me one day I was moaning about wanting to use wholemeal flour and healthy ingredients as well as some delicious dark chocolate. This cake needs only egg whites, no butter, and almost no effort at all!
My (super)mum loves it: she is drawn by its scent and waits for it to come out of the oven like a little girl would. She has it with her espresso and then exclaims, 'Che buona!' (it's yummy!) with a smile. What could be better than that?


Requirements:
  • A loaf-shaped tin, either metal or silicone 
  • UK cups, or a small mug as measurement

Ingredients:
  • 1 and 1/2 cups of wholemeal flour
  • 1 tsp of baking powder
  • 1/2 tsp of baking soda
  • a pinch of salt
  • 3/4 cup of brown sugar
  • 1/4 cup of weak olive oil
  • 2 free-range egg whites
  • 2 large (or 3 small) very ripe bananas
  • 1/4 cup of milk
  • 1 teaspoon of vanilla essence (or 2 sachets of vanillina if you are in Italy)
  • 1 cup of chocolate chips (or chopped-up good-quality dark chocolate)

Method:
Pre-heat the oven to 170 °C (fan assisted) or 180 °C (traditional). 
In a medium bowl, mix flour, baking powder, baking soda and salt.
In a large bowl, mix sugar, oil, egg whites, bananas, milk and vanilla with a spoon. Stir in the dry mixture until they are combined. Stir in the chocolate chips.
Rub some butter onto the inside of the loaf tin, then pour some wholemeal flour into it, shake it so it spreads evenly, and get rid of the excess. Pour the cake mixture into the tin.
Bake for 45 minutes, then test it by inserting a skewer or toothpick into the centre, and into the cracks than will form on its surface. If it comes out clean (or just a little brown from the chocolate) the cake is ready. Otherwise, check again after 5-7 minutes. When it's cooked, let it cool for 5 minutes, then remove it carefully from the pan.
Enjoy with a glass of milk or some coffe, and say ... 'Che buona!'


Q&A
Why is it important that the bananas be ripe?
Because if they are not, you will not be able to taste them in your lovely cake.